How to install and use Primenolly Timesheet Management App
Introduction
Primenolly Timesheet App is a Business Application that runs on Windows 11 and Windows 10 computers only.
Primenolly Timesheet Management App is a cloud-based, time-tracking, TIME CLOCK software that essentially replaces your traditional TIME CARD with a system that is much easier to use, clutter-free, integrates into the computers you already use for your business, and provides Payroll Managers and Company Admins with a tool that can be used to view the Attendance Register, live, from anywhere in the world. Your data is stored in the cloud, so you can now view a live record of who shows up for work, when they clocked in or out, even while you're in another city, country or continent. You can easily view payroll hours at the end of your pay period and submit the hours to your payroll system without the need to use a calculator, as the hours are already computed for you, including PAID-TIME-OFF and SICK-TIME-OFF hours. You do not need to print Timecards anymore or schedule maintenance for physical Timeclocks. This help page includes instructions for every function of the App, so feel free to scroll down and find the topic that deals with your needs. The first section contains information for Company Administrators to download, install and set-up the App on the relevant computers in the organization. If you are a staff member and need to view information on using the App, scroll down to the section - Using the Timesheet Management App.
Installation instructions
This section is for the System Administrator of your organization. It provides detailed information on installation of the App on all relevant computers in your environment. If you are an Employee and wish to learn how to use the App, you may scroll down to locate the specific topic you need under the section - Using the Timesheet Management App.
First, open the Download page on this website and click the Download button at the bottom. A small Dialog Box appears on the top right of the page with options - open; save; save as; - click open. Follow the prompts to install the App on your computer. For most computers, installation will proceed easily to completion. If your Windows 11 or Windows 10 computer is not up-to-date or does not have the pre-requisite files for modern Windows Apps, you may be prompted to install the pre-requisites before proceeding. Make note of the specific pre-requisite files requested, click - Install - on the top right of this webpage to open the - install - page. Click the requested pre-requisite to install. Then, click - Download Timesheet App - at the bottom of the page or go back to the - Download - page to complete the installation.
Post-installation setup
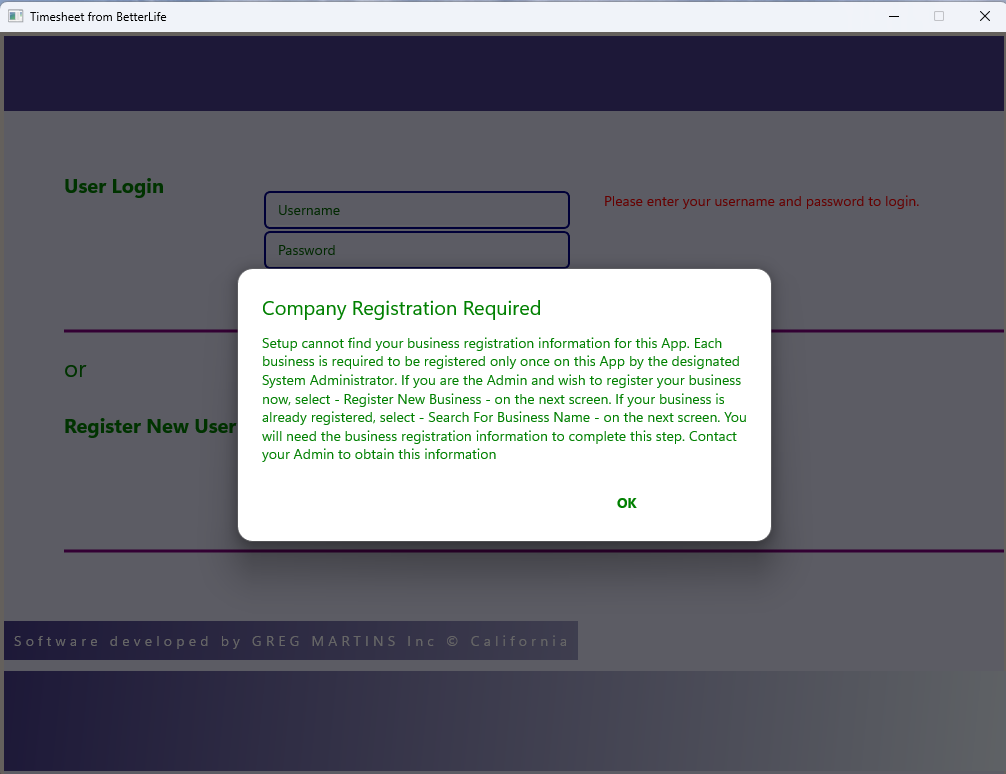
After installation, the Timesheet App should open by default. If not, click the start button and locate it on the list of Apps. Alternatively, locate the search box on your taskbar, type - Timesheet - and the App should pop up. Open the App and follow the prompts. During the first run, you will be prompted to register your company information with the App. Read the message and click - OK - to open the next page.
Installing the first Computer for your Organization
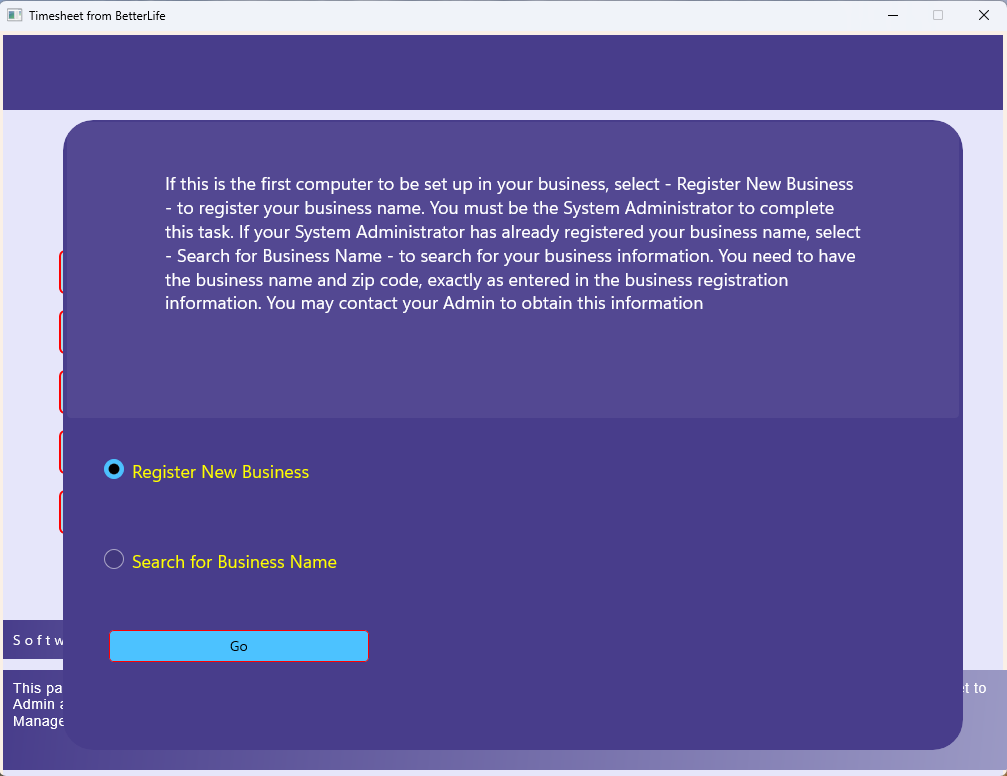
If this is the first computer to be installed in the organization, select - Register New Business - , then click - Go -. This opens the page titled - Register your Company Name and set Admin password.
Register your Company Name and set Admin password
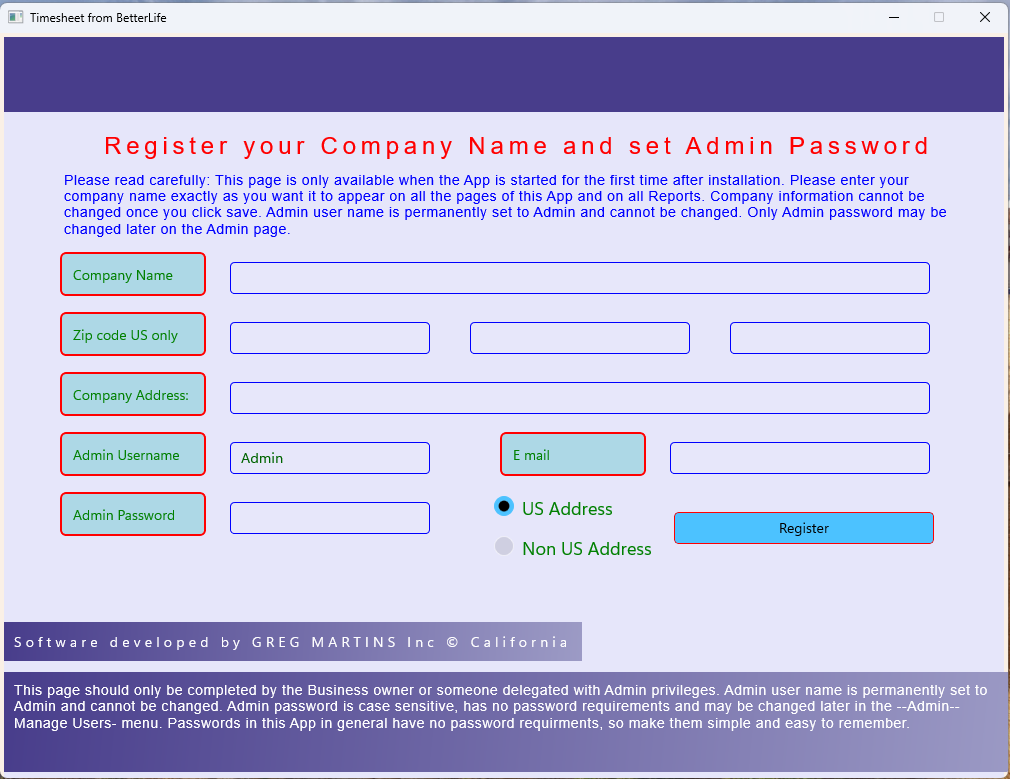
Read all the instructions, complete all required information correctly. If your organization is in the US, enter your zip code in the space provided and the city and state should be automatically populated in their respective boxes. If you receive a message - Zip not found -, select - Non-US Address - to disable the zip code, city and state boxes. In that case, enter your entire business address in the Company Address box. When you're done, click - Register. Next, you'll be directed to the license activation page.
Manage Software License
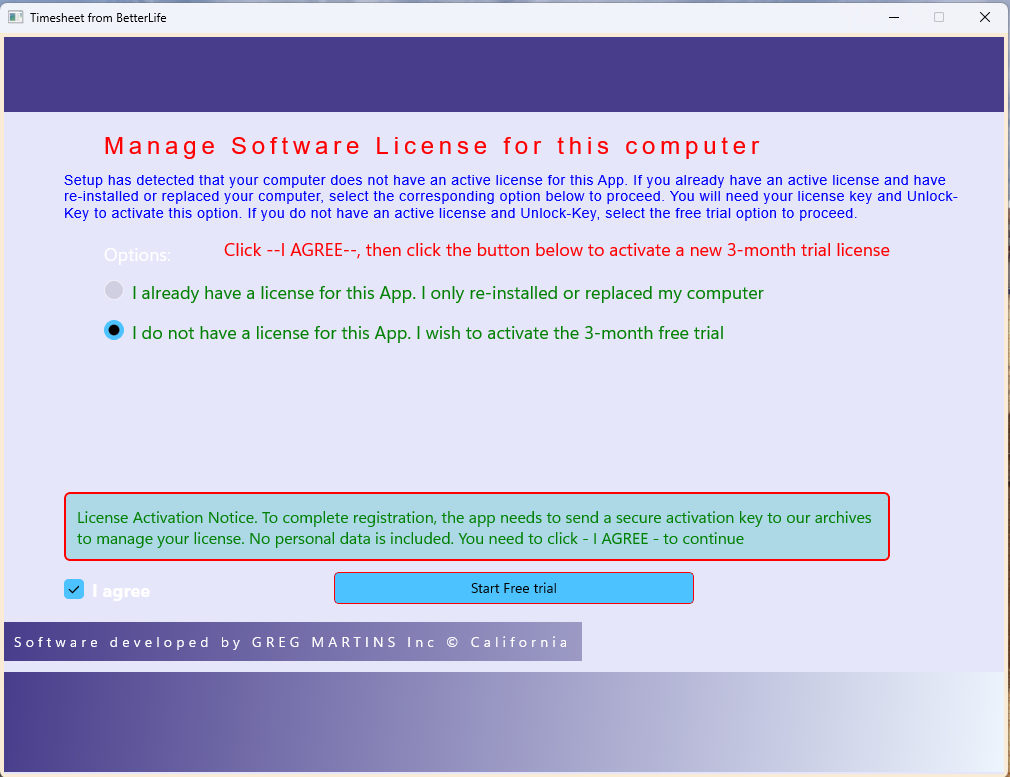
If this is your first time using the App, we recommend you choose the second option on this page - I do not have a license. I wish to activate the 3-month free trial - . This will give you a 3-month free trial period to use the App on all your computers and decide if it fits your organization.
Success
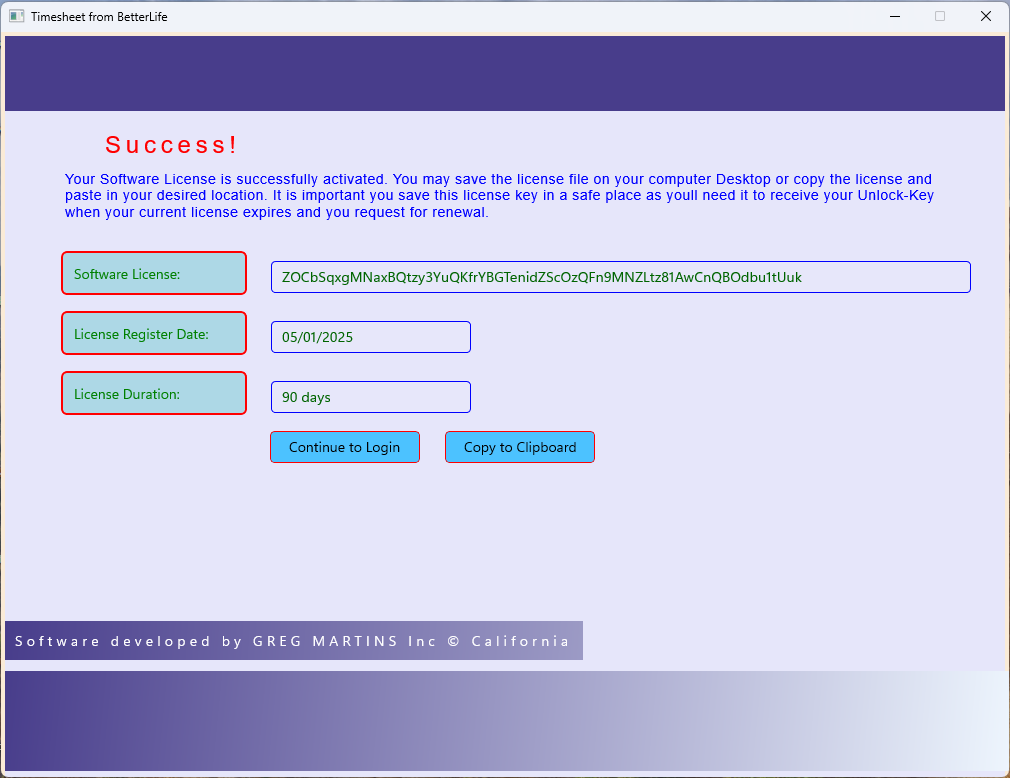
Once the license is activated, the license-activated page will open, showing you the license key, activation date and duration. A file containing this information is also saved on your desktop. You can also view this information at any time on the - Admin > Manage Users - page. For now, click on - Continue to login - to open the login page.
Login
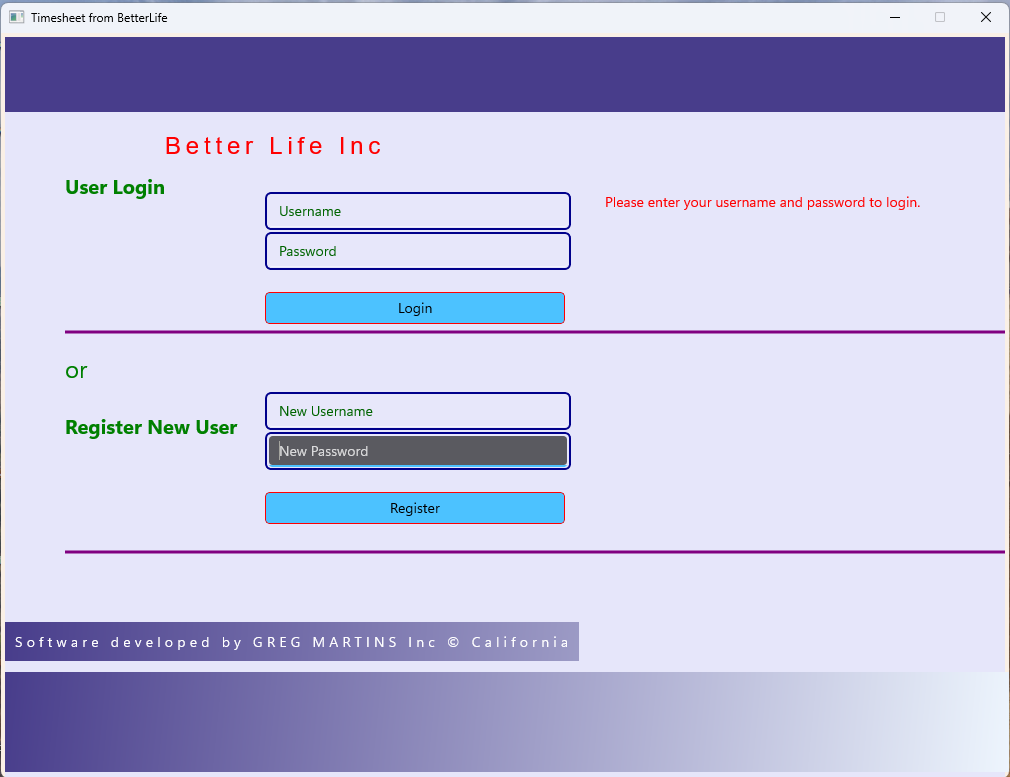
Enter - Admin - on the username and the Admin password. This will open the home page.
Home
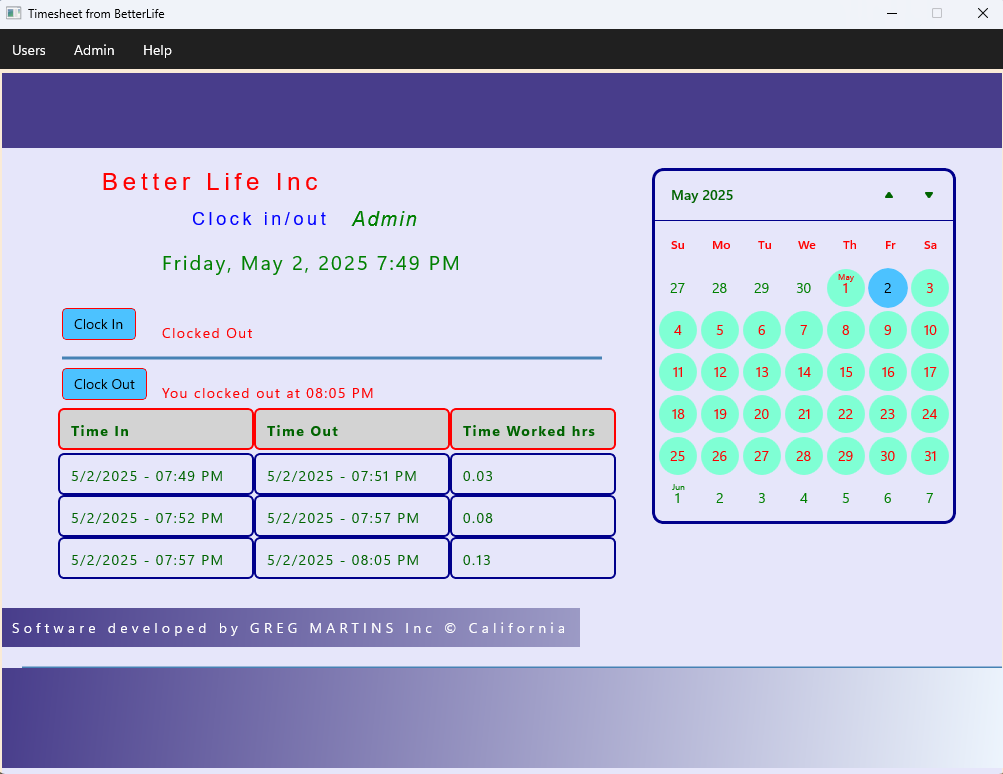
As the Admin, you have completed setting up the first computer for your organization.
Installing Subsequent Computers for your Organization
While setting up the first computer for the organization, you registered the Company Name, Address and set the Admin password. For each of the subsequent computers in your organization, you only need to install the App, then search for your Company Name to join the new computer to your Company Domain. To get started, download and install the App on each of the other computers in your organization, as you already did with the first computer. After installation, the Timesheet App should open by default. If not, click the start button and locate it on the list of Apps. Alternatively, locate the search box on your taskbar, type - Timesheet - and the App should pop up. Open the App and follow the prompts.
First Run
During first run, you will be prompted to register your company information with the App. Read the message and click - OK - to open the next page.
Search for Business Name
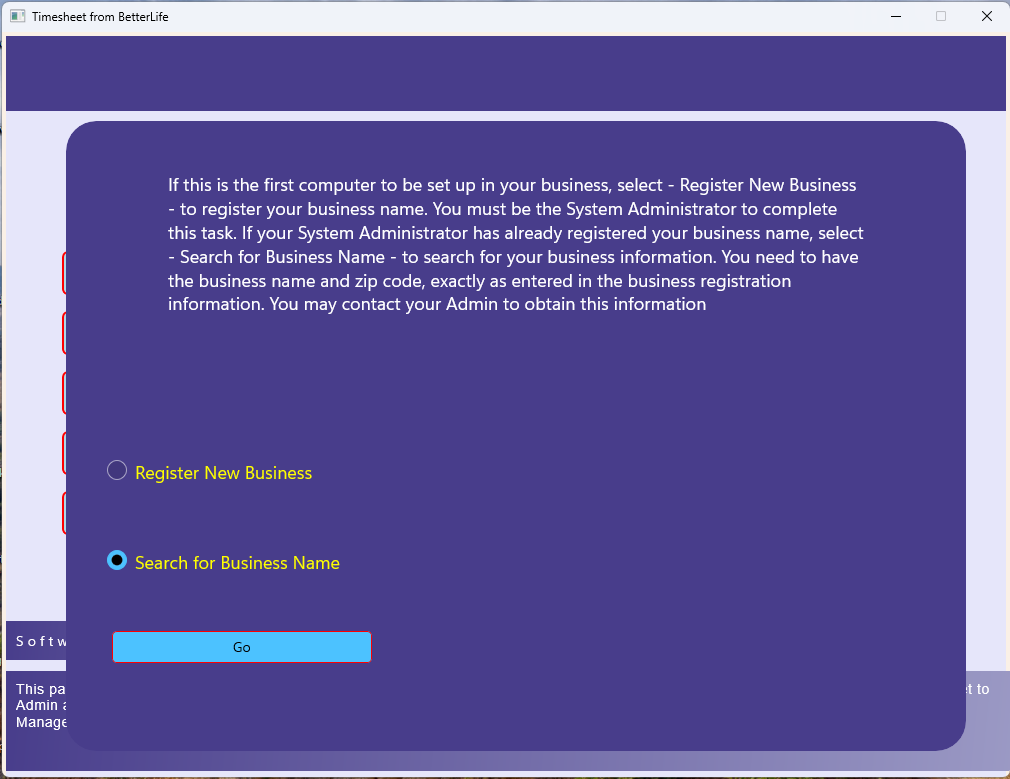
Since you had already registered your company information on the first computer, you will now select - Search for Business Name - on this page. Click - Go - to open the search page.
Enter your company information to join your Company Domain
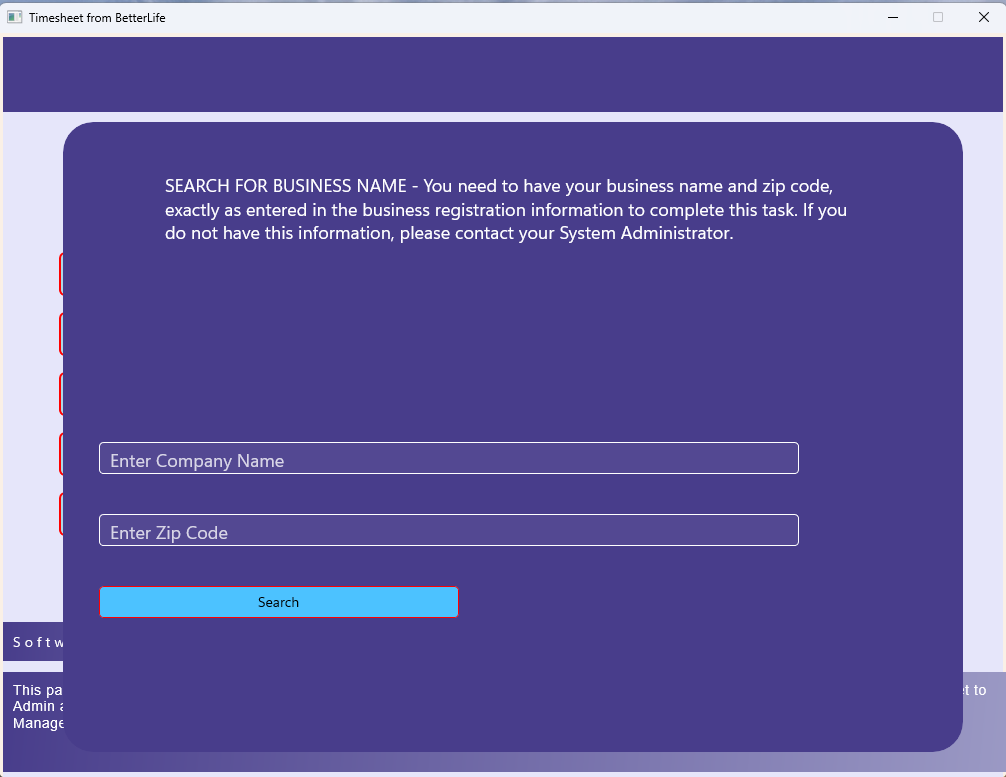
To complete this step, you will need your company name exactly as it was entered during registration. If you do not have this information, go to any of the computers that are already set up and login. On the home page, Click - Admin > Manage Users - to open the Admin page. Click the button - Company Information - to show your company information report. You will see your company name and zip code. You may print this information as it will be required for installation of all other computers in your organization. If your company registration did not include a zip-code or if your organization is outside the US, simply enter your company name and leave the zip-code field blank.
Bonus: Additional Admin tasks
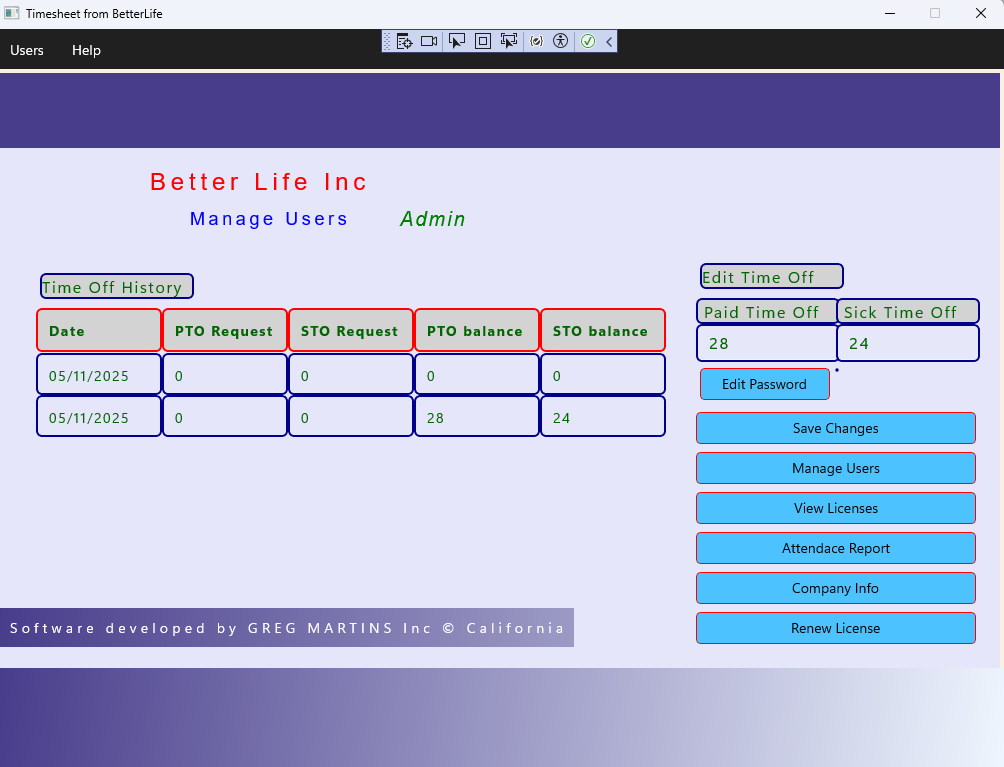
To open the Admin page, click the menu - Admin > Manage Users. As the Admin, you can view or change the Admin password and renew the software license for the computer. You can also open the - Manage Users - page for additional functions described in the next section. On this page also, all users can view Company Information (Company name and Zip code), open a printable Attendance report for any given period and view licence information for all computers on the Domain.
Manage Other Users
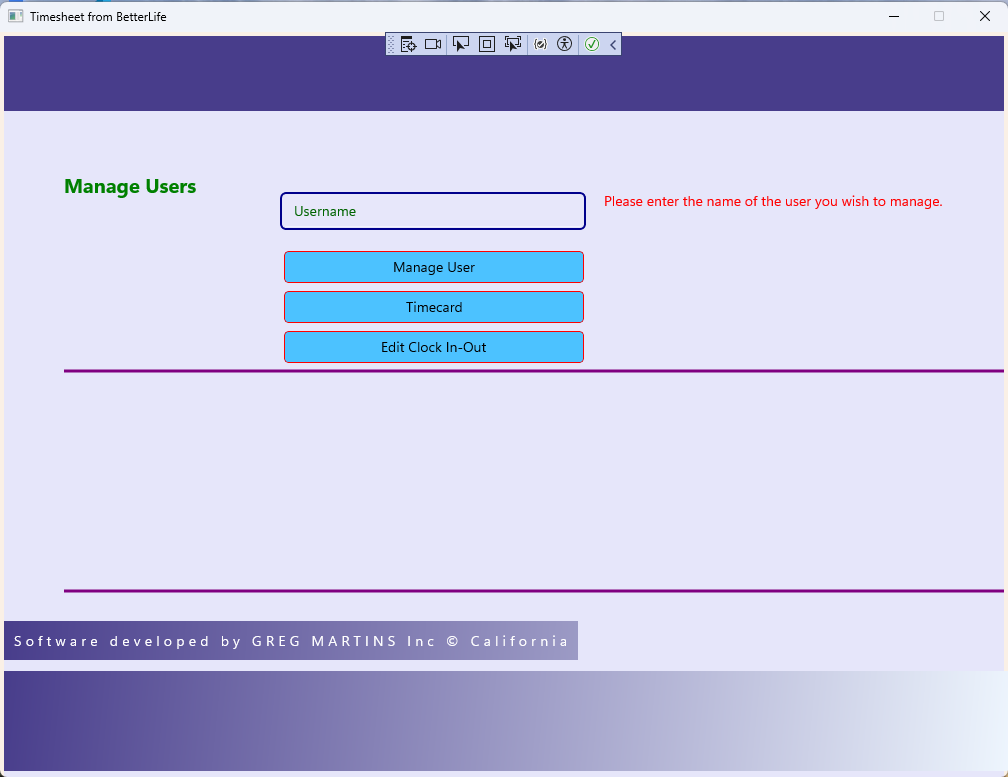
Click the menu - Admin > Manage Users, then click the - Manage Users - button to open this page. As the Admin, you have access to some key pages of all other users in your Domain from this page - the Timecard Summary page, the Admin page and Edit ClockIn/Out page. This is a modified login page to access and modify STO/PTO and edit ClockIn/Out information for all other users as well as view Timecard summary for a selected time span. You only need the Employee's username but do not need their password to login on this page. Note that there are no menu bars on the pages you open from here, as a security measure. Only Admins have the privilege of getting to this environment. Payroll Managers may also be given access to this resource so they can collate payroll hours when needed, depending on your business rules. To open any of these administrative pages for another Employee, enter the Employee's username, then click the respective button to open the page.
Edit ClockIn/Out
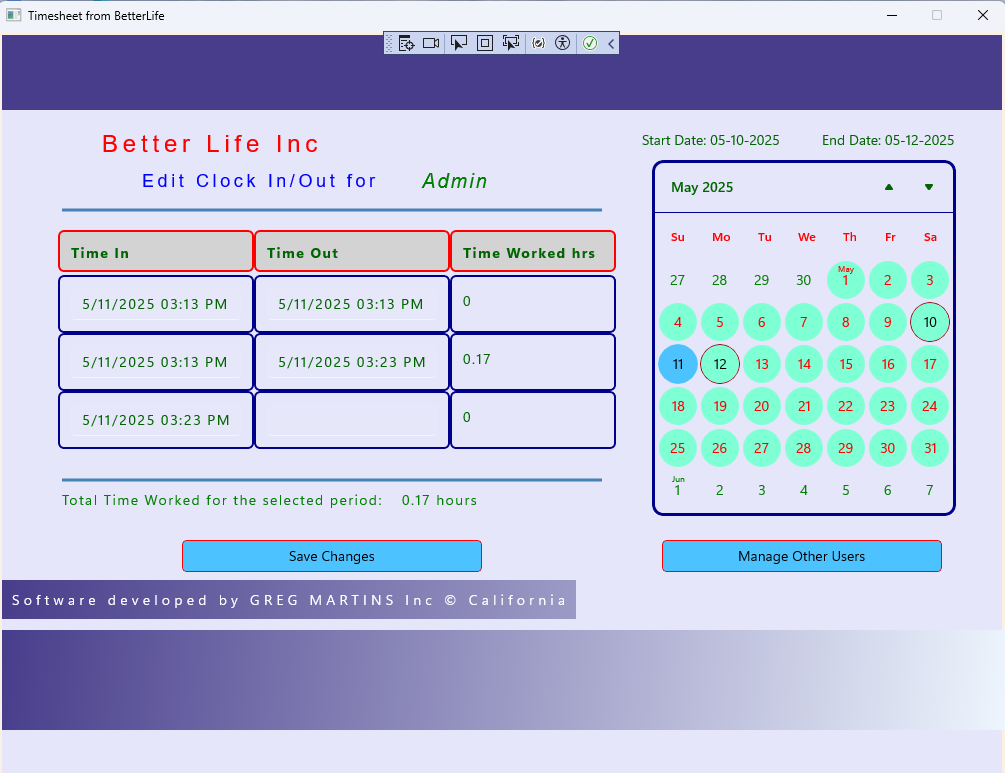
This page has been included due to popular demand. It comes in handy especially if an Employee forgets to clock out at the end of the day's work. When they return to work the next day, they are unable to clock in, except they first clock out. When this happens, a huge number error is introduced into the record of Time-Worked. In this unusual situation, the Employee is expected to report the mistake to Admin. To maintain data integrity and ensure the Employee is not paid for hours they did not work, the System Admin may open this page and edit the Time-Out or Time-In as needed. First select 2 dates on the calendar-view, a start-date and an end-date to view the attendance between those dates. Locate the date you wish to edit and manually type the date and time. This page requires that the date-time is entered exactly as expected in the format - mm/dd/yyy hr:min AM/PM. If the entry is not in the required format, it is reversed and a message pops up giving you additional information on the requirements.
License Management
Each computer requires a software license to run this App. You have the option to obtain a one-time, free, 3-month license for each computer during installation. At the expiration of 3 months, you get an additional 1-month grace period to renew and activate a new, 1-year paid license. Each time the App is started during the grace period, a message is displayed informing the user that the license is expired and by how many days. When the countdown reaches 30 days, the App stops working and the user is directed to the license activation page instead. During the grace period, you are required to contact our sales team and obtain the Unlock-Key for each of your computers. To do this, first locate the file containing your license key, named - TimesheetLicense.txt - on the desktop of each respective computer. Send this file to our sales team as an e-mail attachment to Primenollyappreceiver@gmail.com. Once you obtain the Unlock-Key, you will use it to renew your license. To renew your license during the grace period, login with your Admin password, click the menu - Admin > Manage Users, then click - Renew License-. Double-click the license file on the desktop to open it in Notepad or WordPad or any other text editor. It is recommended that you copy the license text and paste on the App as the text is long and difficult to type accurately. Then type the unlock-key provided to you by our sales team. Click the button - Activate - to complete the renewal process. You will repeat this process for each of the computers in your organization. The license key file contains the name of the respective computer and the associated license key. Use the license key and the Unlock-Key for the corresponding computer only as the key combination cannot activate any other computer except the one listed on the file. Our sales team will provide you with 10 keys for 10 computers in your domain for each renewal. If you have additional computers, you may obtain a second license for 10 additional keys as needed. The default license duration is 1 year but you may request for a custom key with anywhere between 2 to 10 years as needed if you do not wish to keep repeating this process every year. If you re-install any participating computer and erase all the files including the App and it's related data, simply download the App from the website, reinstall it and use your existing license key/Unlock-key pair to activate the App. It will register the remaining duration on your license. If you replace a participating computer altogether, note that your existing license will not work on another computer. In this case, contact our technical support team for instructions on how to transfer a license key to another computer.
You will now be required to train your staff on using the App. It is recommended that you pin the App button to the taskbar for every computer. To do this, simply open the App in the desired computer, right click the App icon on the Taskbar and select - pin to taskbar - . When you're all done, assemble the staff together and begin the training process, as described below
Using the Timesheet Management App
After set-up by the organization's Admin, users can now begin using the App. Here are instructions for using the App daily.
Login page
When a user arrives at work, they will open the App to clockin. New users are required to register their username and password first before they can login. As a first-time user, click the - Register new user - button, enter your name and password to register. You are encouraged to use the name by which you are known in the organization and a simple password that you are unlikely to forget as this App has no password requirements. Once registered, you can now use the same credentials to login.
Clock-in / Clock-out page (Home page)
When you login, the first page that shows is the Home page. All you need to do here is click - clock in - . You'll see the fancy grid appear below with your TimeIn date and time. That's it. Your're all done. Close the App and proceed with your day's work. When you need to clockout for a break, or go home, simply login again as described above, click - clock out - and your're done. Close the App and go on with your break or go home. Whenever you return, repeat the clock in process as described. Easy!
Paid-Time-Off / Sick-Time-Off page
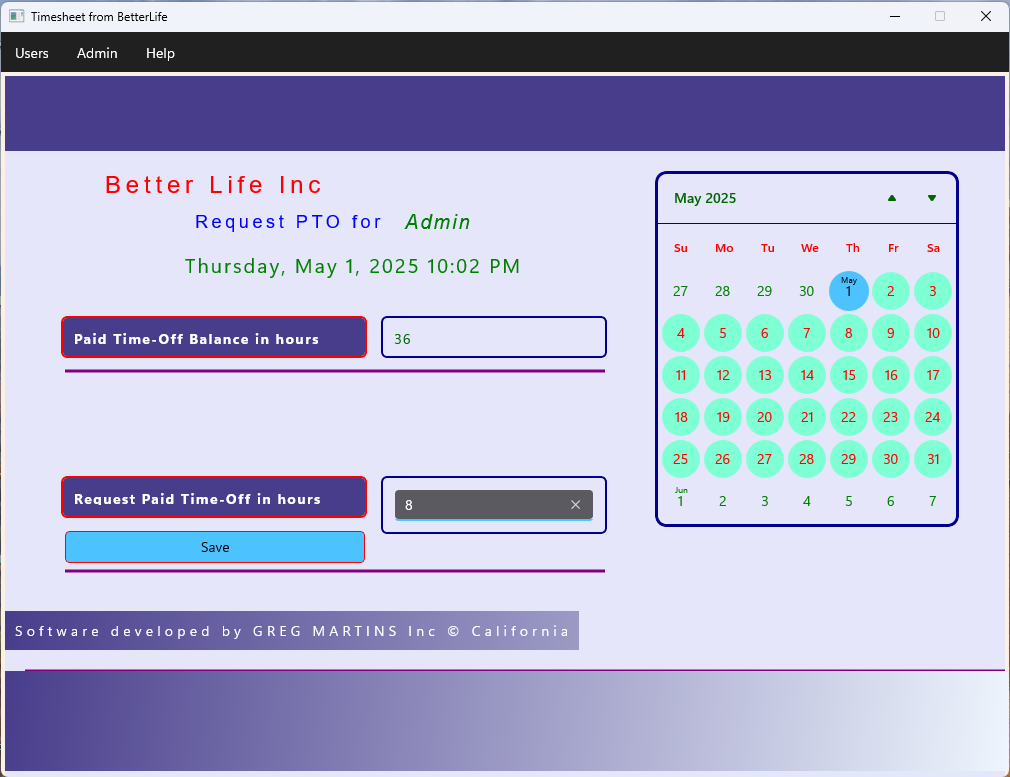
If your organization permits you to enter paid-time-off or sick-time-off hours for use in the payroll, this funtionality is built into the App. On the menu, click Users - Request Paid Time Off or Request Sick Time Off. The 2 pages are similar and easy to use. On top, it shows how much time-off balance you have left for the year. This field is read-only, and the time balance is set by Admin, usually at the beginning of the year. The field below allows you to enter the number of hours you wish to take out of your balance, for use in the current payroll period. When you click - Save - the number of hours you entered is subtracted from your paid-time-off or sick-time-off balance and transferred to your payroll hours.
Timecard page
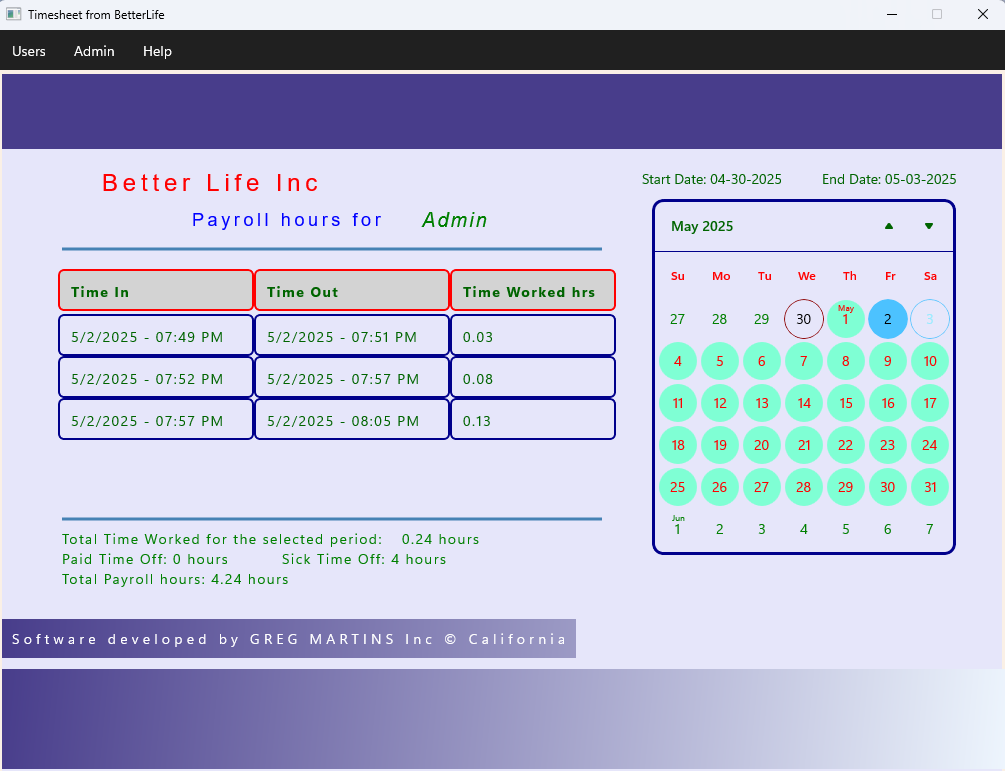
If you wish to view your clock-in clock-out history over a period, on the menu, click - Users - Timecard summary. On this page, select the start date and end date on the calendar for the period you wish to see and your clock-in/clock-out history displays. Below the grid, you'll see the total hours worked for the period, the paid-time-off and sick-time-off hours, if you requested any for the selected period, and the overall total hours. You may use this page to cross-check your paycheck.
Admin page for all users
As a staff member, you may view the Admin page to see your paid-time-off and sick-time-off history. On the menu, click - Admin - Manage Users - to open the page. You have read-only access to the resources on this page. Only designated personnel with Admin privileges will be able to make changes here. You may view your time-off history and current balance, your attendance report for any period, the company information report, and the license information for the computers on your company domain.
Help page
You may open this online help page from any page in the App. On the menu, click Help to open this page on your default browser.